The letter “V” stands for Views in the MVC framework. It keeps the presentation logic and the application logic apart. Resources/views is where views are kept. The HTML that will be supplied by the program is often found in the view.

Example
To learn more about views, look at the sample below.
Step 1: Copy and save the code below at resources/views/test.php.
<html>
<body>
<h1>Hello, World</h1>
</body>
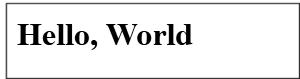
</html>Step 2: To configure the route for the aforementioned view, add the following line to the app/Http/routes.php directory.
Route::get('/test', function() {
   return view('test');
});
Step 3: Go to the URL below to view the view’s output.
http://localhost:8000/testStep 4: The result will look like what’s in the image below.
Data Transfer to Views
When developing an application, passing data to the views could be necessary. An array is sent to the view helper method. The key can be used to retrieve the value of a key in the HTML file once an array has been passed.
Example
For further information on passing data to views, take a look at the following example.
Step 1: Copy the code below and save it to resources/views/test.php.
<html>
<body>
<h1><?php echo $name; ?></h1>
</body>
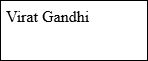
</html>Step 2: To set the route for the above view, add the following line to the app/Http/routes.php file.
Route::get('/test', function() {
   return view('test',[‘name’=>’Virat Gandhi’]);
});
Step 3: The test.php code will receive the value of the key name, and $name will be changed to reflect that value.
Step 4: To view the view’s output, go to the following URL.
http://localhost:8000/testStep 5: The output will look like the image below.
Data Sharing for All Views
Example
To learn more about sharing data with all viewpoints, take a look at the sample below.
Step 1: Insert the line below into the app/Http/routes.php file.
Route::get('/test', function() {
   return view('test');
});

Route::get('/test2', function() {
   return view('test2');
});
Step 2: Use the same code to create two view files, test.php and test2.php. These two files will exchange information. The code below should be copied into both files. materials/views/test.php and materials/views/test2.php
<html>
   <body>
      <h1><?php echo $name; ?></h1>
   </body>
</html>
Step 3: Modify the boot method code in the app/Providers/AppServiceProvider.php file as indicated below. (In this case, the data we gave will be shared with all views since we used the share method.) app/Providers/AppServiceProvider.php
<?php

namespace App\Providers;
use Illuminate\Support\ServiceProvider;

class AppServiceProvider extends ServiceProvider {

   /**
      * Bootstrap any application services.
      *
      * @return void
   */

   public function boot() {
      view()->share('name', 'Virat Gandhi');
   }

   /**
      * Register any application services.
      *
      * @return void
   */

   public function register() {
      //
   }
}
Step 4: Go to the URLs listed below.
http://localhost:8000/test
http://localhost:8000/test2
Step 5: The output will look like the image below.
Understanding Laravel Blade
The idea of creating a distinctive layout with Blade, a templating engine, is introduced in Laravel 5.1. The resulting layout has a uniform structure and design and may be utilized by different viewpoints.
- The developer is still free to use standard PHP code in views.
- The blade views created in this way are compiled and stored in a cache until they are altered.
The screenshot provided below displays the entire directory structure of Laravel.
As you can see, the Laravel framework’s default view is welcome.blade.php; all additional views are stored in the resources/views directory.
Please be aware that identical steps are taken to generate different blade templates.
To develop a blade template layout, you must follow these steps:
Step 1
- Make a layout folder within the views/resources folder. All of the layouts will be kept together in this folder.
- Make a file called master.blade.php and attach the following code to it.
<html>
   <head>
      <title>DemoLaravel - @yield('title')</title>
   </head>
   <body>
      @yield('content')
   </body>
</html>
Step 2
The layout should be extended in this step. In order to extend a layout, the child elements must be defined. Laravel defines the child elements using the Blade @extends directive.
Please take heed of the following when extending a layout-
- Views specified in the Blade Layout give the container a special injection.
- A variety of view portions are produced as child elements.
- Child components are kept as child.blade.php in the layouts folder.
Below is an example of extending the preceding layout.
@extends('layouts.app')
@section('title', 'Page Title')
@section('sidebar')
   @parent
<p>This refers to the master sidebar.</p>
@endsection
@section('content')
<p>This is my body content.</p>
@endsection
Proper layout definition is crucial for integrating child elements into your views
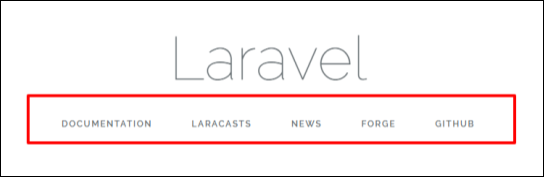
Take a look at this screenshot. Every link included on the landing page is a hyperlink, as you can see. Please be aware that by following the preceding steps, you may also use blade templates to construct them as child elements.