Laravel’s localization capability allows for the use of many languages in applications. All of the strings in various languages must be kept in a single file, which is kept in the resources/views directory. Each supported language should have its own directory. As seen below, an array of keyed strings should be returned by all language files.

<?php
return [
   'welcome' => 'Welcome to the application'
];
Example
Step 1 −Make three language-specific files: English, French, and German. The English file should be saved under resources/lang/en/lang.php.
<?php
   return [
      'msg' => 'Laravel Internationalization example.'
   ];
?>
Step 2 − Save French file at resources/lang/fr/lang.php.
<?php
   return [
      'msg' => 'Exemple Laravel internationalisation.'
   ];
?>
Step 3 − Save German file at resources/lang/de/lang.php.
<?php
return [
'msg' => 'Laravel Internationalisierung Beispiel.'
];
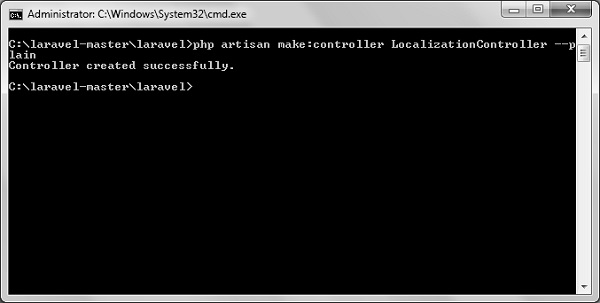
?>Step 4 − Use the following command to create a controller named LocalizationController.
php artisan make:controller LocalizationController --plainStep 5 − Following a successful execution, you will obtain the output that follows:
Step 6 − The code below should be copied to a file.
app/Http/Controllers/LocalizationController.php
app/Http/Controllers/LocalizationController.php
<?php

namespace App\Http\Controllers;

use Illuminate\Http\Request;
use App\Http\Requests;
use App\Http\Controllers\Controller;

class LocalizationController extends Controller {
   public function index(Request $request,$locale) {
      //set’s application’s locale
      app()->setLocale($locale);

      //Gets the translated message and displays it
      echo trans('lang.msg');
   }
}
Step 7 − Add a LocalizationController route to the app/Http/routes.php file. We will utilize the {locale} option to view output in a different language, as you can see by passing it after localization.
app/Http/routes.php
Route::get('localization/{locale}','LocalizationController@index');Step 8 − To view all of the languages, let’s go to the various URLs. To view the output in English, click the URL below.
http://localhost:8000/localization/enStep 9 − The output will look like what’s in the picture below.

Step 10 − To view the output in French, click the URL below..
http://localhost:8000/localization/frStep 11 − This is how the output will look in the next picture.

Step 12 − Execute the below URL to see output in German language.
http://localhost:8000/localization/deStep 13 − The output will look like what’s in the picture below.

Understanding Laravel Sessions
Information about the user is stored in sessions across requests. To manage session data, Laravel offers a number of drivers, including file, cookie, apc, array, Memcached, Redis, and database. Due to its lightweight nature, the file driver is used by default. The file config/session.php contains the session configuration information.
Working with Session Data
$value = $request->session()->get('key');To obtain all session data, you can use the all() method rather than the get() method.
Saving Data in Laravel Sessions
The put() method can be used to store data in a session. The “key” and the “value” are the two arguments that the put() method will accept.
$request->session()->put('key', 'value');Clearing Session Data in Laravel
To remove an object from the session, use the forget() method. “Key” will be the argument used in this procedure.
$request->session()->forget('key');Instead of using the forget() method to remove all session data, use the flush() function. To retrieve and then erase data from a session, use the pull() method. Additionally, key will be passed as an input to the pull() method. The forget() and pull() methods differ in that the former will not return the session value, while the latter will do so while deleting it from the session.
Example
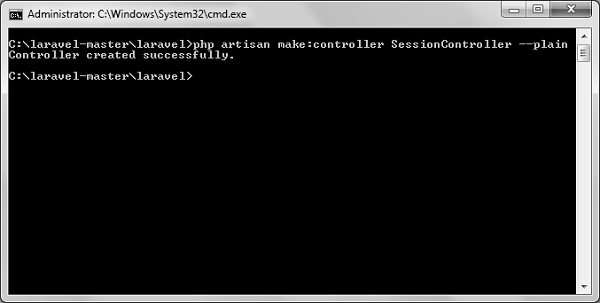
Step 1 − Run the following command to create a controller named SessionController.
php artisan make:controller SessionController --plainStep 2 − Following a successful execution, you will obtain the output that follows:
Step 3 − The code below should be copied into a file at
app/Http/Controllers/SessionController.php.
app/Http/Controllers/SessionController.php
<?php

namespace App\Http\Controllers;

use Illuminate\Http\Request;
use App\Http\Requests;
use App\Http\Controllers\Controller;

class SessionController extends Controller {
   public function accessSessionData(Request $request) {
      if($request->session()->has('my_name'))
         echo $request->session()->get('my_name');
      else
         echo 'No data in the session';
   }
   public function storeSessionData(Request $request) {
      $request->session()->put('my_name','Virat Gandhi');
      echo "Data has been added to session";
   }
   public function deleteSessionData(Request $request) {
      $request->session()->forget('my_name');
      echo "Data has been removed from session.";
   }
}
Step 4 − The lines below should be added to the app/Http/routes.php file.
app/Http/routes.php
Route::get('session/get','SessionController@accessSessionData');
Route::get('session/set','SessionController@storeSessionData');
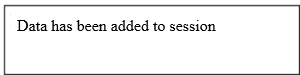
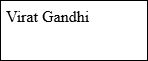
Route::get('session/remove','SessionController@deleteSessionData');Step 5 − In order to set data in session, go to the URL below.
http://localhost:8000/session/setStep 6 − The output will appear as shown in the following image.
Step 7 − To obtain session data, go to the following URL.
http://localhost:8000/session/getStep 8 − The output will look like what’s in the picture below.
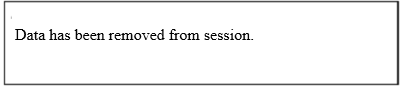
Step 9 − Go to this URL to get rid of session data.
http://localhost:8000/session/removeStep 10 − A message will appear, as seen in the picture below.
Data Validation in Laravel
When it comes to application design, validation is the most crucial component. It verifies the data coming in. The main controller class by default makes use of the ValidatesRequests trait, which offers a practical way to verify incoming HTTP requests using a number of strong validation criteria.
List of Laravel Validation Rules
If there are any mistakes in the session data, Laravel will immediately connect them to the view after checking for them. Importantly, you can comfortably assume that the $errors variable is always defined and safe to use because it will always be present in all of your views on every request. All of the Laravel validation rules are displayed in the following table.
List of Laravel Validation Rules
| Accepted | Active URL | After (Date) |
| Alpha | Alpha Dash | Alpha Numeric |
| Array | Before (Date) | Between |
| Boolean | Confirmed | Date |
| Date Format | Different | Digits |
| Digits Between | Exists (Database) | |
| Image (File) | In | Integer |
| IP Address | JSON | Max |
| MIME Types(File) | Min | Not In |
| Numeric | Regular Expression | Required |
| Required If | Required Unless | Required With |
| Required With All | Required Without | Required Without All |
| Same | Size | String |
| Timezone | Unique (Database) | URL |
Illuminate\Support\MessageBag will be an instance of the $errors variable. By adding the code as indicated below, an error message can be shown in the view file.
@if (count($errors) > 0)
   <div class = "alert alert-danger">
      <ul>
         @foreach ($errors->all() as $error)
            <li>{{ $error }}</li>
         @endforeach
      </ul>
   </div>
@endif
Example
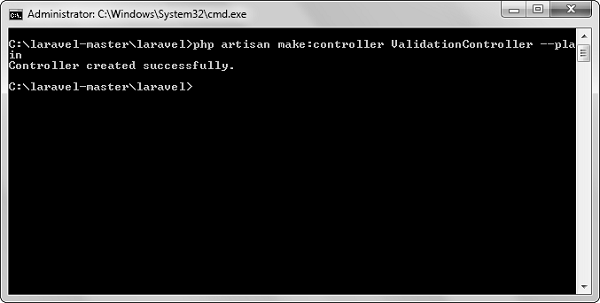
Step 1 − Use the following command to create a controller named ValidationController.
php artisan make:controller ValidationController --plainStep 2 − Following a successful execution, you will obtain the output that follows:
Step 3 − The code below should be copied into app/Http/Controllers/ValidationController.php file.
app/Http/Controllers/ValidationController.php
<?php

namespace App\Http\Controllers;

use Illuminate\Http\Request;
use App\Http\Requests;
use App\Http\Controllers\Controller;

class ValidationController extends Controller {
   public function showform() {
      return view('login');
   }
   public function validateform(Request $request) {
      print_r($request->all());
      $this->validate($request,[
         'username'=>'required|max:8',
         'password'=>'required'
      ]);
   }
}
Step 4 − The following code should be copied into a view file named resources/views/login.blade.php.
resources/views/login.blade.php
<html>

   <head>
      <title>Login Form</title>
   </head>

   <body>

      @if (count($errors) > 0)
         <div class = "alert alert-danger">
            <ul>
               @foreach ($errors->all() as $error)
                  <li>{{ $error }}</li>
               @endforeach
            </ul>
         </div>
      @endif

      <?php
         echo Form::open(array('url'=>'/validation'));
      ?>

      <table border = '1'>
         <tr>
            <td align = 'center' colspan = '2'>Login</td>
         </tr>
         <tr>
            <td>Username</td>
            <td><?php echo Form::text('username'); ?></td>
         </tr>
         <tr>
            <td>Password</td>
            <td><?php echo Form::password('password'); ?></td>
         </tr>
         <tr>
            <td align = 'center' colspan = '2'
               ><?php echo Form::submit('Login'); ?  ></td>
         </tr>
      </table>

      <?php
         echo Form::close();
      ?>

   </body>
</html>
Step 5 − The lines below should be added to app/Http/routes.php.
app/Http/routes.php
Route::get('/validation','ValidationController@showform');
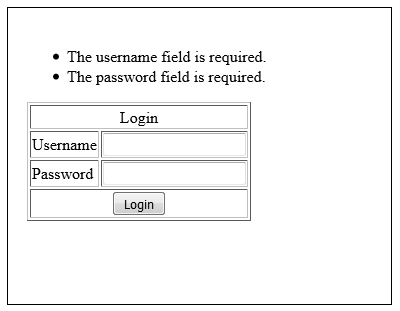
Route::post('/validation','ValidationController@validateform');Step 6 − To verify the validation, click the following link.
http://localhost:8000/validationStep 7 − Enter nothing in the text area and click the “Login” button. The final product will resemble the image below.