This chapter discusses how to effectively handle user input with Laravel Requests, which includes processing input, query parameters, headers, file uploads, and validation.

Getting the Request URI Back
The requested URI is retrieved using the “path” method. The requested URI that fits the specific pattern given in the method’s argument is retrieved using the is method. We can use the url technique to obtain the complete URL.
Example
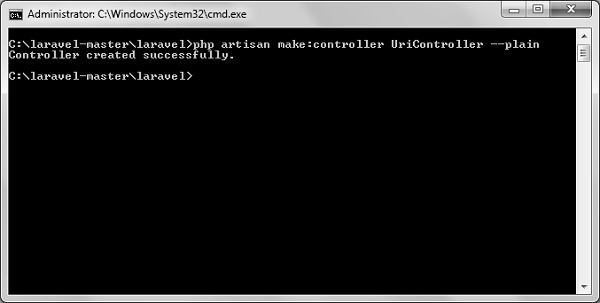
Step 1 − To build a new controller named UriController, run the command below.
php artisan make:controller UriController --plainStep 2 − The following output will be displayed once the URL has been successfully executed.
Step 3 − Once a controller has been created, add the following code to that file.
app/Http/Controllers/UriController.php
<?php

namespace App\Http\Controllers;

use Illuminate\Http\Request;
use App\Http\Requests;
use App\Http\Controllers\Controller;

class UriController extends Controller {

   public function index(Request $request) {
      // Usage of path method
      $path = $request->path();
      echo 'Path Method: '.$path;
      echo '<br>';

      // Usage of is method
      $pattern = $request->is('foo/*');
      echo 'is Method: '.$pattern;
      echo '<br>';

      // Usage of url method
      $url = $request->url();
      echo 'URL method: '.$url;
   }
}
Step 4 − In the app/Http/route.php file, add the line that follows.
app/Http/route.php
Route::get('/foo/bar','UriController@index');Step 5 − Go to the URL below.
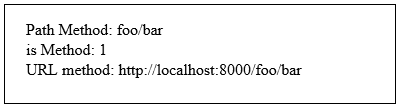
http://localhost:8000/foo/barStep 6 − The output will look like what’s in the picture below.
Obtaining user input.
Laravel makes it simple to access the input values. The Laravel method will retrieve input values for both “get” and “post” methods in the same manner, regardless of which method was used. We can retrieve the input values in two different ways.
∎ Obtaining user input via the input() function.
∎ Using Request instance properties.
Making use of the input() method
The name of the form field is the only argument required by the input() method. If the form has a username field, for instance, we can access it in the manner shown below.
$name = $request->input('username');Example
Take a look at this sample to learn more about requests.
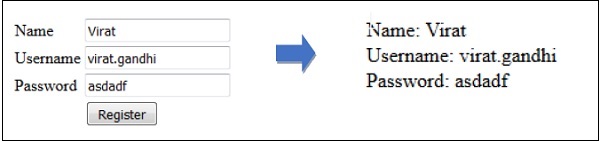
Step 1 − Make a registration form that allows users to register themselves, then save it under resources/views/register.php.
<html>
<head>
<title>Form Example</title>
</head>
<body>
<form action = "/user/register" method = "post">
<input type = "hidden" name = "_token" value = "<?php echo csrf_token() ?>">
<table>
<tr>
<td>Name</td>
<td><input type = "text" name = "name" /></td>
</tr>
<tr>
<td>Username</td>
<td><input type = "text" name = "username" /></td>
</tr>
<tr>
<td>Password</td>
<td><input type = "text" name = "password" /></td>
</tr>
<tr>
<td colspan = "2" align = "center">
<input type = "submit" value = "Register" />
</td>
</tr>
</table>
</form>
</body>
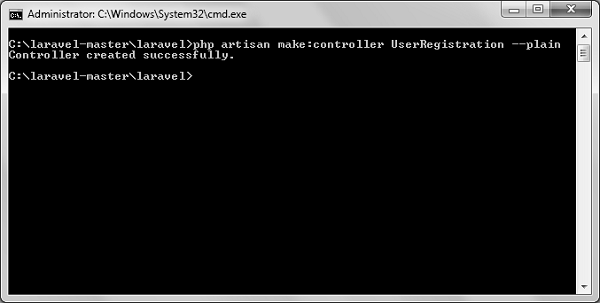
</html>Step 2 − To construct a UserRegistration controller, use the command below.
php artisan make:controller UserRegistration --plainStep 3 − Following the preceding step’s successful completion, you will obtain the following output.
Step 4 − Copy the code that follows in
app/Http/Controllers/UserRegistration.php controller.
app/Http/Controllers/UserRegistration.php
<?php

namespace App\Http\Controllers;

use Illuminate\Http\Request;
use App\Http\Requests;
use App\Http\Controllers\Controller;

class UserRegistration extends Controller {
   public function postRegister(Request $request) {
      //Retrieve the name input field
      $name = $request->input('name');
      echo 'Name: '.$name;
      echo '<br>';

      //Retrieve the username input field
      $username = $request->username;
      echo 'Username: '.$username;
      echo '<br>';

      //Retrieve the password input field
      $password = $request->password;
      echo 'Password: '.$password;
   }
}
Step 5 − Include the line below in the app/Http/routes.php file.
app/Http/routes.php
Route::get('/register',function() {
   return view('register');
});
Route::post('/user/register',array('uses'=>'UserRegistration@postRegister'));
Step 6 − You can view the registration form as it appears in the figure below by visiting the following URL. After entering the registration information and clicking Register, the user registration information will be retrieved and shown on the second page.
http://localhost:8000/registerStep 7 − The output will look like the images below.